Foundation is the base for your entire makeup look. Learning how to apply it well is key, whether you’re new to makeup or just want to improve your daily look.
The secret to a great finish is understanding your own skin. There is no “one-size-fits-all” method. You need to know your skin type (like oily or dry), your skin’s undertone (the color underneath your skin), and the right tricks for you.
This guide covers everything a beginner needs to know.
Understanding Your Skin Type: The First Step
Before you buy a foundation, you must know your skin type. This is the most important step to get a look that lasts all day.
Oily Skin
Oily skin makes extra oil, especially in the “T-zone” (your forehead, nose, and chin). This can make makeup slide off and look shiny by the afternoon.
Best plan for oily skin:
- Choose “matte” or “oil-free” foundations. They help control shine.
- Use a “mattifying” primer (a base product) to create a barrier between your skin and the makeup.
- Set your foundation with a light powder, especially on your T-zone, to stop oil.
- Look for sweat-resistant makeup.
Dry Skin
Dry skin needs moisture. It can look flaky or dull, and makeup can settle into fine lines or dry patches.
Best plan for dry skin:
- Choose “hydrating,” “dewy,” or “cream” foundations. They add moisture and a healthy glow.
- Use a “hydrating” primer to smooth your skin.
- Apply foundation with your fingers or a damp sponge, which is gentler.
- Avoid using too much powder. It can make skin look dry and “chalky.”
- Tip: Mix a drop of face oil with your foundation for extra moisture.
Combination Skin
This means you have both oily parts (usually your T-zone) and dry parts (usually your cheeks).
Best plan for combination skin:
- You might need two primers: one for oil control on your T-zone and a hydrating one on your dry cheeks.
- A medium-coverage liquid foundation often works well.
- You can also mix two foundation types (like matte and dewy) to get the perfect finish.
Sensitive Skin
Sensitive skin tends to get red, itchy, or irritated easily. It needs gentle products.
Best plan for sensitive skin:
- Choose foundations that are “fragrance-free” (no smell) and “hypoallergenic” (safe for sensitive skin).
- Mineral foundations are often a good choice.
- Apply gently. Don’t pull or rub your skin hard.
- Make sure your brushes and sponges are always clean.
Normal Skin
If your skin is not too oily or too dry, you have normal skin. You can try many different products.
Best plan for normal skin:
- You can choose any foundation you like, from matte to dewy.
- Experiment with different tools (fingers, brush, or sponge) to see what looks best.
Finding Your Undertone: The Key to Your Perfect Color
Your undertone is the natural color under your skin. It is not about how light or dark your skin is. A person with fair skin can have a warm undertone, and a person with deep skin can have a cool one. Finding a foundation that matches your undertone is the key to looking natural.
The Three Main Undertones
- Warm: Your skin has hints of yellow, golden, or olive.
- Cool: Your skin has hints of pink, red, or blue.
- Neutral: Your skin has a mix of warm and cool tones.
Quick Tests to Find Your Undertone
-
- The Vein Test: Look at the veins on your wrist in daylight.
- Greenish veins: Warm undertone.
- Blue or purple veins: Cool undertone.
- A mix of green and blue: Neutral undertone.
- The Vein Test: Look at the veins on your wrist in daylight.
- The Jewelry Test: Which jewelry looks better on your skin?
- Gold: Warm undertone.
- Silver: Cool undertone.
- Both look good: Neutral undertone.
- The Sun Test: How does your skin react to the sun?
- You tan easily: You likely have a warm undertone.
- You burn or turn red: you likely have a cool undertone.
Notes for Indian & US Skin Tones
Both India and the US have a beautiful and huge range of skin tones.
- For Indian Skin: Skin can be “wheatish” (medium) with golden tones, fair with yellow tones, or deep with cool tones. Never assume your undertone based on how light or dark your skin is. Always test.
- For US Skin: The US market has many, many choices. This is great, but it can be hard to choose.
How to Test: Put a few stripes of foundation on your jawline. Go near a window to see it in natural daylight. The color that “disappears” into your skin and also matches your neck is the right one.
Step-by-Step: How to Apply Foundation
Now that you know your skin type and undertone, here is how to apply your foundation.
Step 1: Prep Your Skin (This is a “Must-Do”)
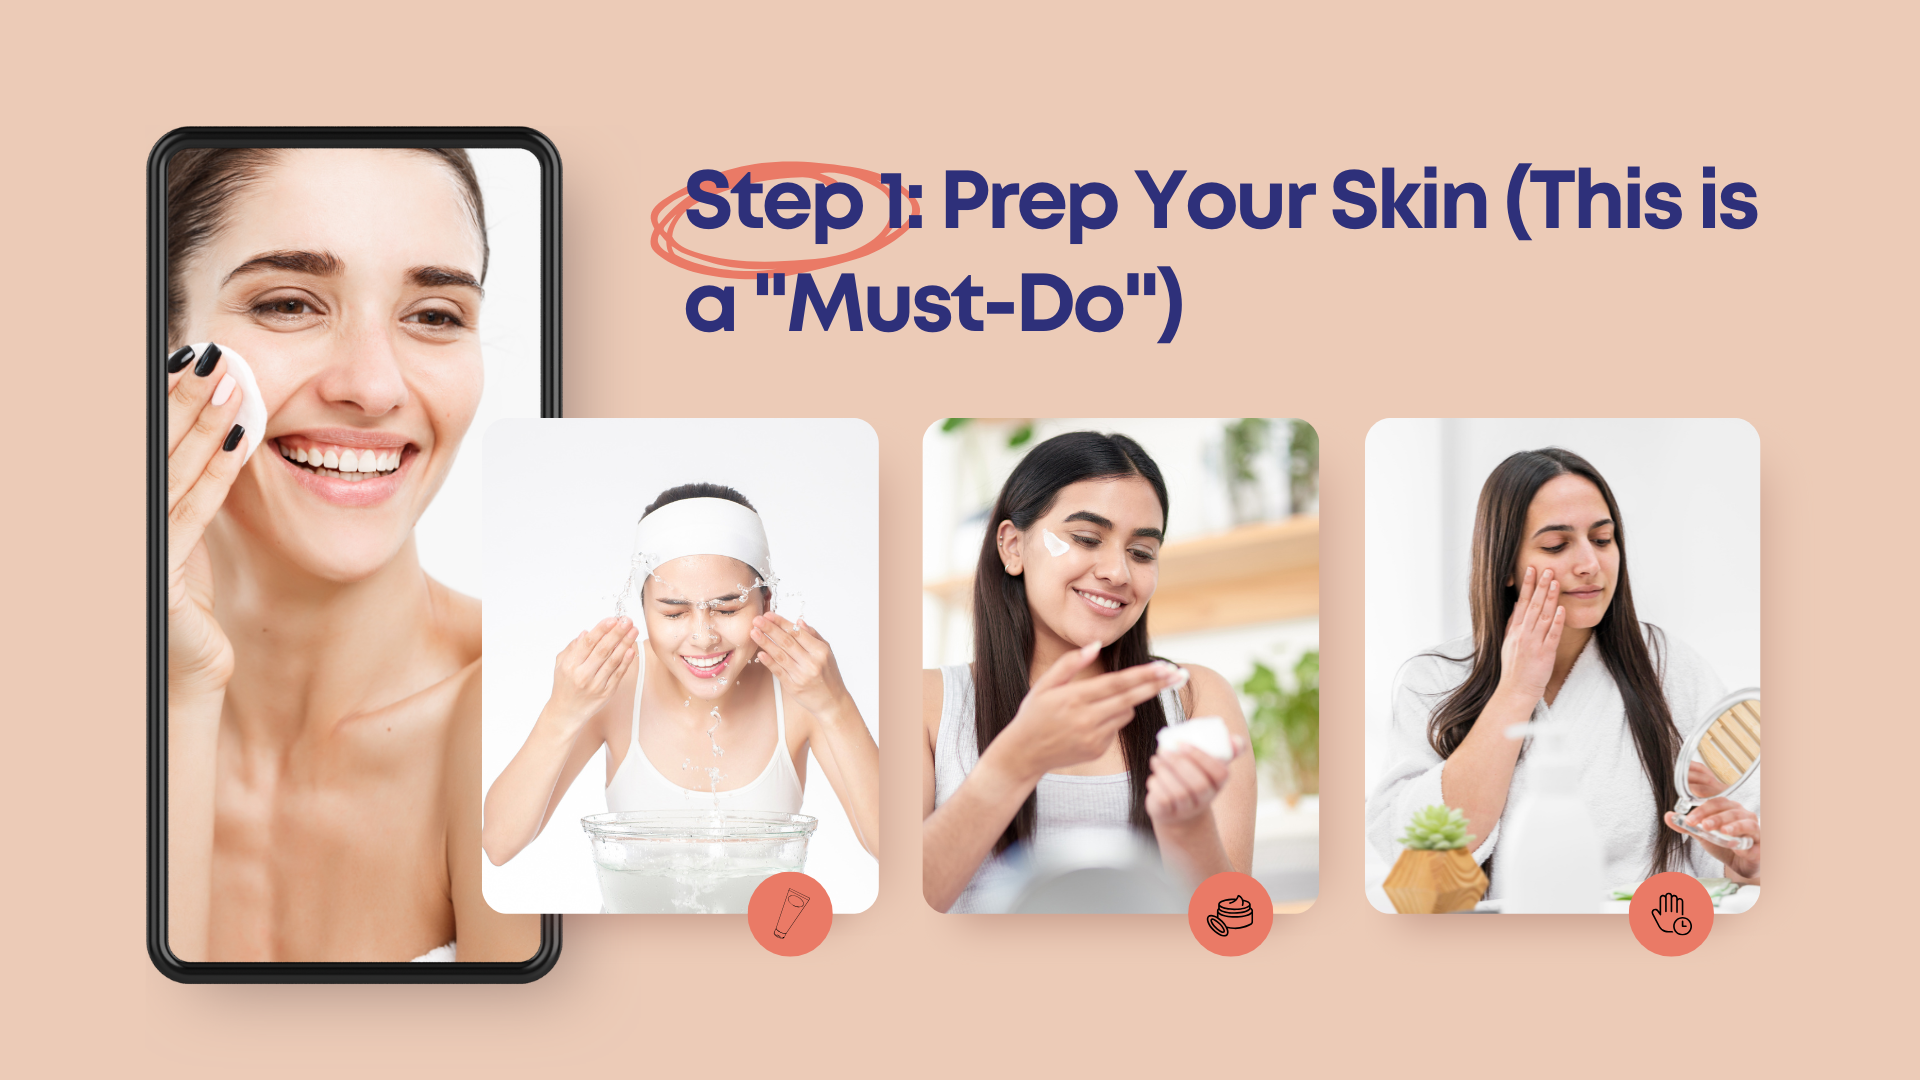
Makeup looks best on skin that is clean and smooth.
- Cleanse: Wash your face to remove dirt and oil.
- Moisturize: Apply a face cream for your skin type. This is important for all skin types, even oily skin (just use an oil-free one).
- Wait: Let your moisturizer sink in for 5-10 minutes.
Step 2: Prime Your Skin
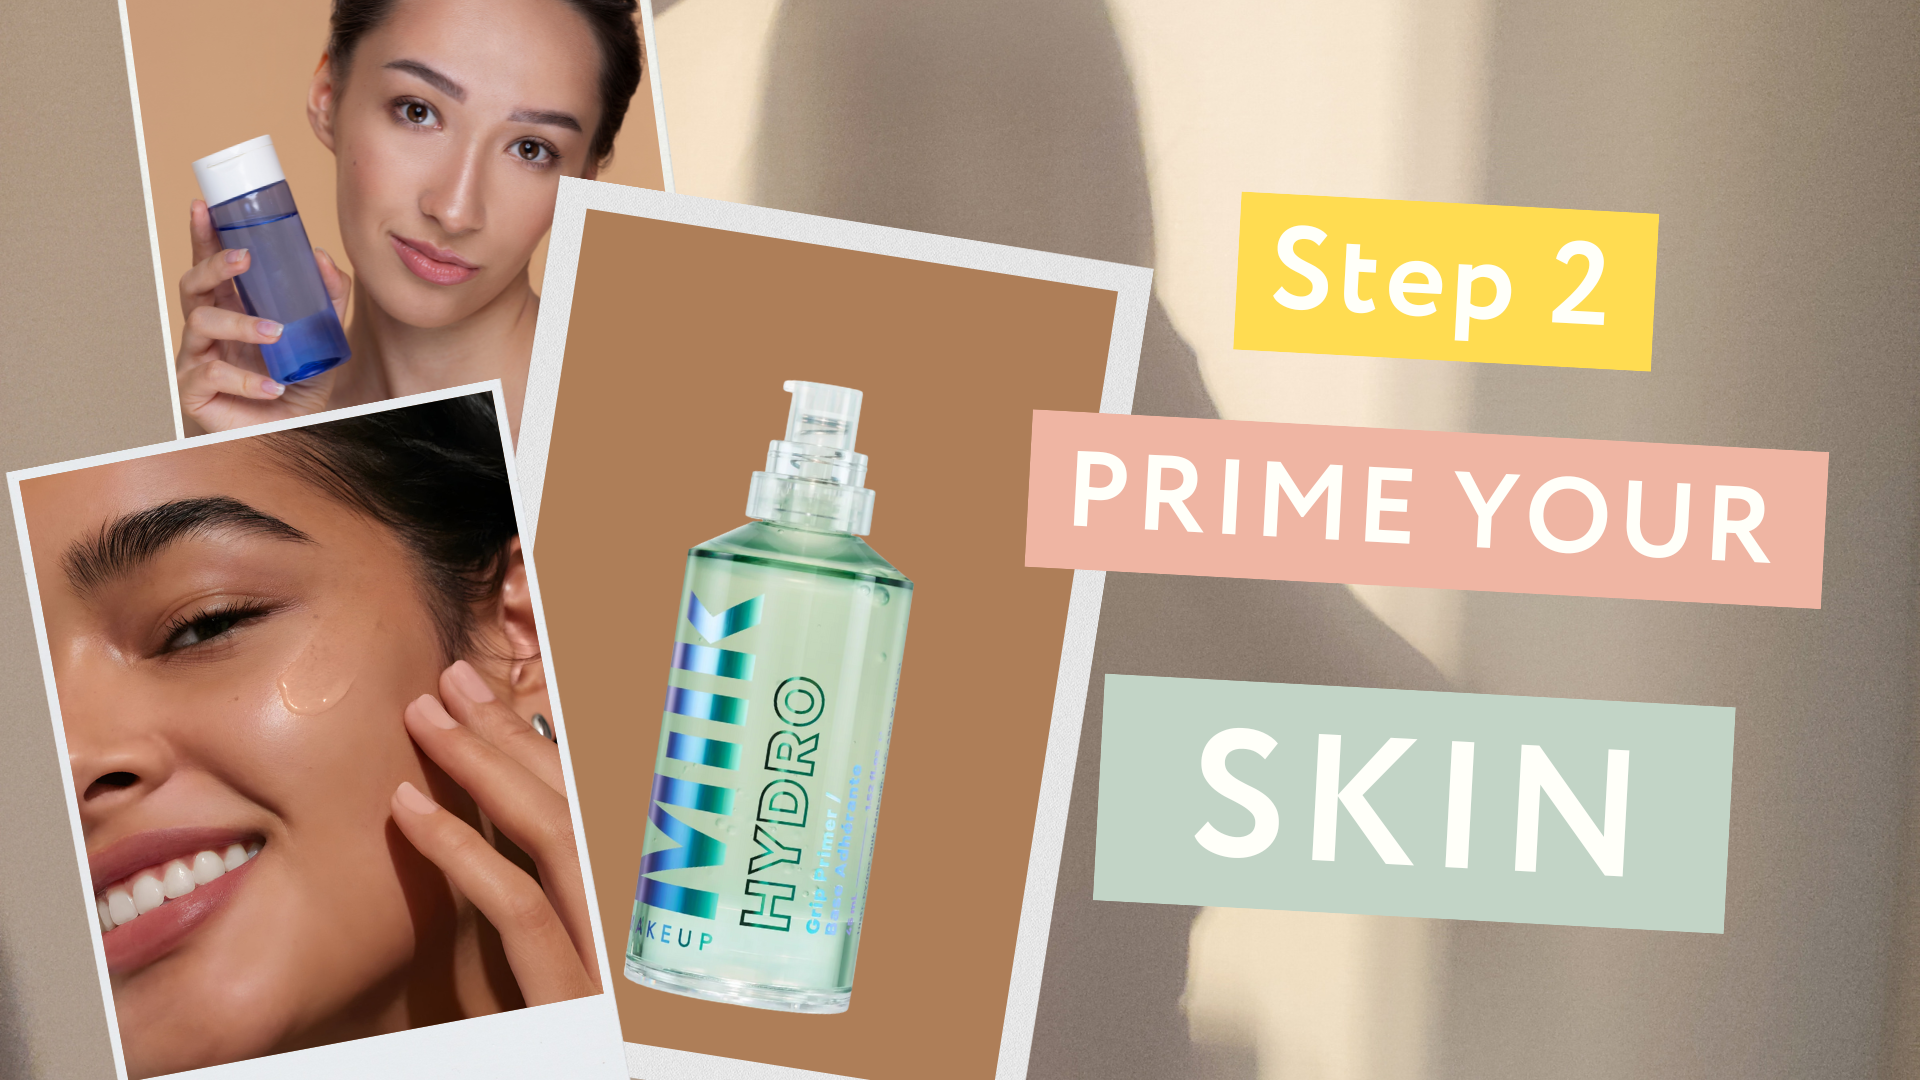
A primer is a base that makes your skin smooth and helps makeup last longer.
- Oily skin? Use a primer that controls oil.
- Dry skin? Use a primer that adds moisture.
- Let the primer set for 1-2 minutes.
Step 3: Choose Your Foundation & Shade

- Liquid: Good for most people. You can apply a little for a natural look or add more for full coverage.
- Cream/Stick: Good for dry skin or if you want more coverage.
- Powder: Good for oily skin.
- Tinted Moisturizer: Good for a very light, natural look.
Remember: When you test a shade, wait 10-15 minutes. Some foundations get a little darker as they dry. This is called “oxidation.”
Step 4: Apply with the Right Tool
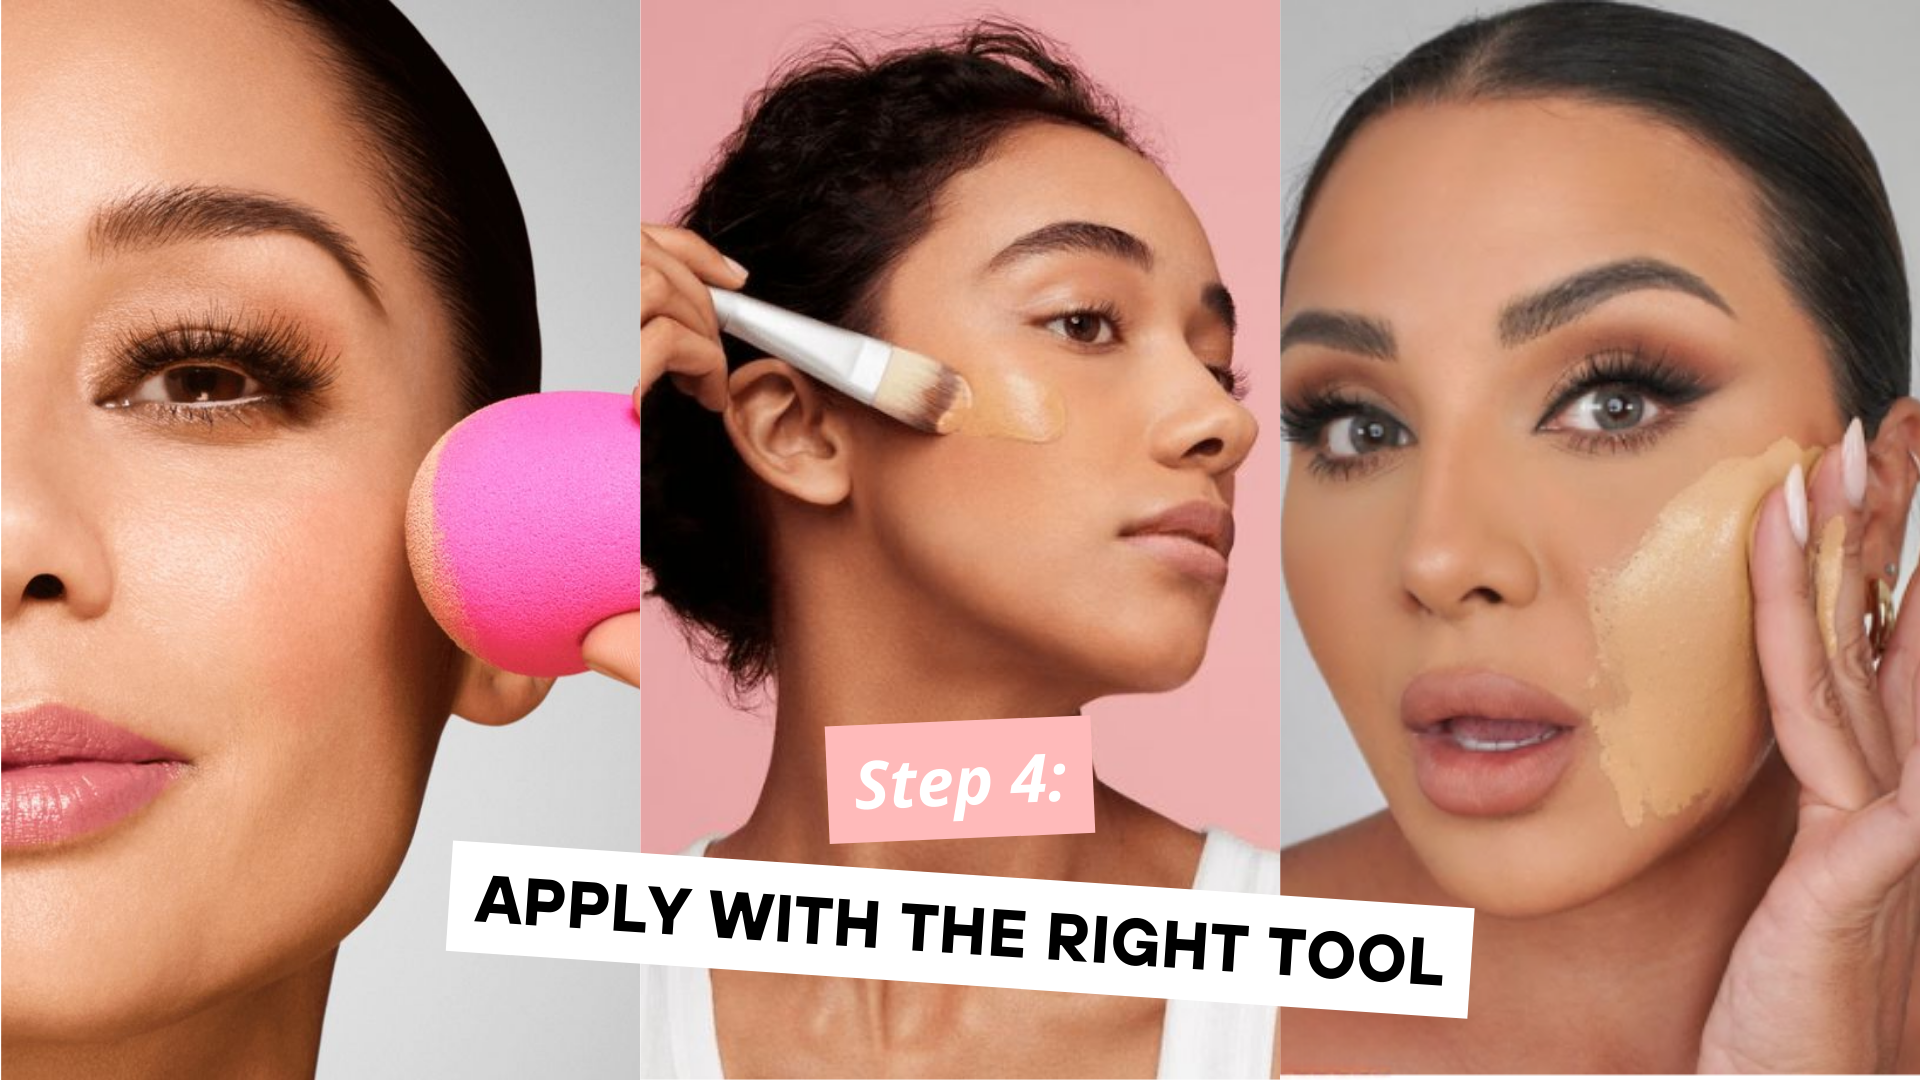
The tool you use changes the final look.
- Damp Beauty Sponge:
- Run the sponge under water, then squeeze all the water out. It should be damp, not wet.
- Gently tap (don’t rub) the foundation onto your skin.
- This gives a very smooth, natural, “airbrushed” look.
- Makeup Brush:
- Use small strokes or circular motions to blend the foundation.
- This gives you more control and often more coverage.
- Your Fingers:
- The warmth from your fingers helps the foundation “melt” into your skin.
- This is great for a natural look, especially with tinted moisturizers or cream foundations.
Pro Tip: Start with a small amount of foundation. You can always add more where you need it. This stops your makeup from looking “cakey” (too thick).
Step 5: Blend, Blend, Blend

- Start applying foundation in the center of your face (nose, inner cheeks) and blend it outward toward your hairline and jaw.
- Make sure to blend it down your jawline and onto your neck a little. This stops that “mask” look where your face and neck are two different colors.
Step 6: Set Your Foundation
This “locks” your makeup in place.
- For oily/combination skin: Lightly “press” a translucent (see-through) powder onto your T-zone.
- For dry/normal skin: You can skip powder or use a very small amount.
- Everyone: A “setting spray” is a great final step. It’s a light mist that melts all the makeup together and makes it last for hours.
Common Foundation Mistakes (and How to Fix Them)
- Mistake 1: The Wrong Color.
- The Fix: Always test on your jawline (not your hand!) in natural daylight.
- Mistake 2: Skipping Skin Prep.
- The Fix: Always, always moisturize first. The foundation will stick to dry spots if you don’t.
- Mistake 3: Using Too Much.
- The Fix: Start with a tiny bit. Build up in thin layers only where you need more coverage.
- Mistake 4: Not Blending Your Neck.
- The Fix: Take 10 extra seconds to blend down your jawline and onto your neck.
- Mistake 5: Using Too Much Powder.
- The Fix: Too much powder can make you look dry and older. Use it only where you get shiny.
Quick Checklist for Beginners
Before You Buy:
- Know your skin type (oily, dry, etc.).
- Know your undertone (warm, cool, neutral).
- Test 2-3 shades on your jawline.
- Check them in natural daylight.
When You Apply:
- Cleanse and moisturize.
- Prime your skin.
- Apply a small amount of foundation.
- Start in the center and blend out.
- Blend down your neck.
- Set with powder (if needed) or setting spray.
Conclusion
Learning to apply the foundation takes practice. Your needs might change with the seasons. The key is to work with your skin, not against it.
Be patient, practice, and have fun.
For more personalized advice, product recommendations, and expert tips just like this, get in touch with Dazzlerr! We’re here to help you on your beauty journey.
Similar Posts